| Metropower Portal | ||
| ||
 Hadleys' 1996 Metro R100 Knightsbridge Hadleys' 1996 Metro R100 KnightsbridgeModerators: Jump to page : 1 Now viewing page 1 [25 messages per page] | |
| Gallery-> Members' Journals | Message format |
| Mhadley |
| ||
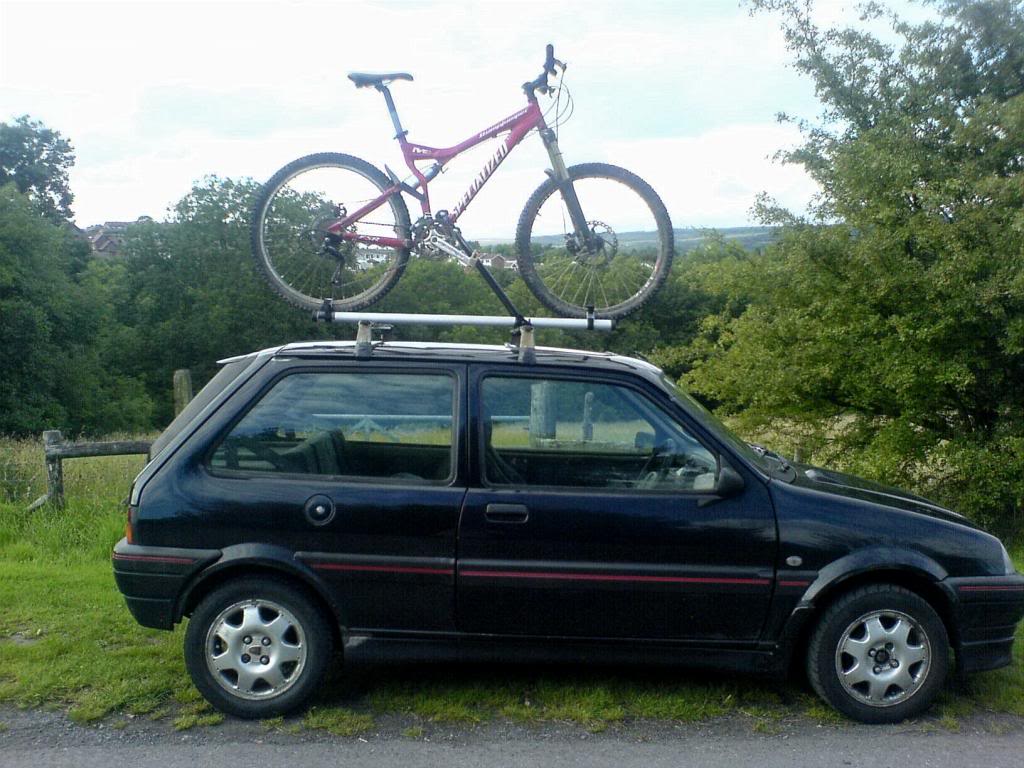
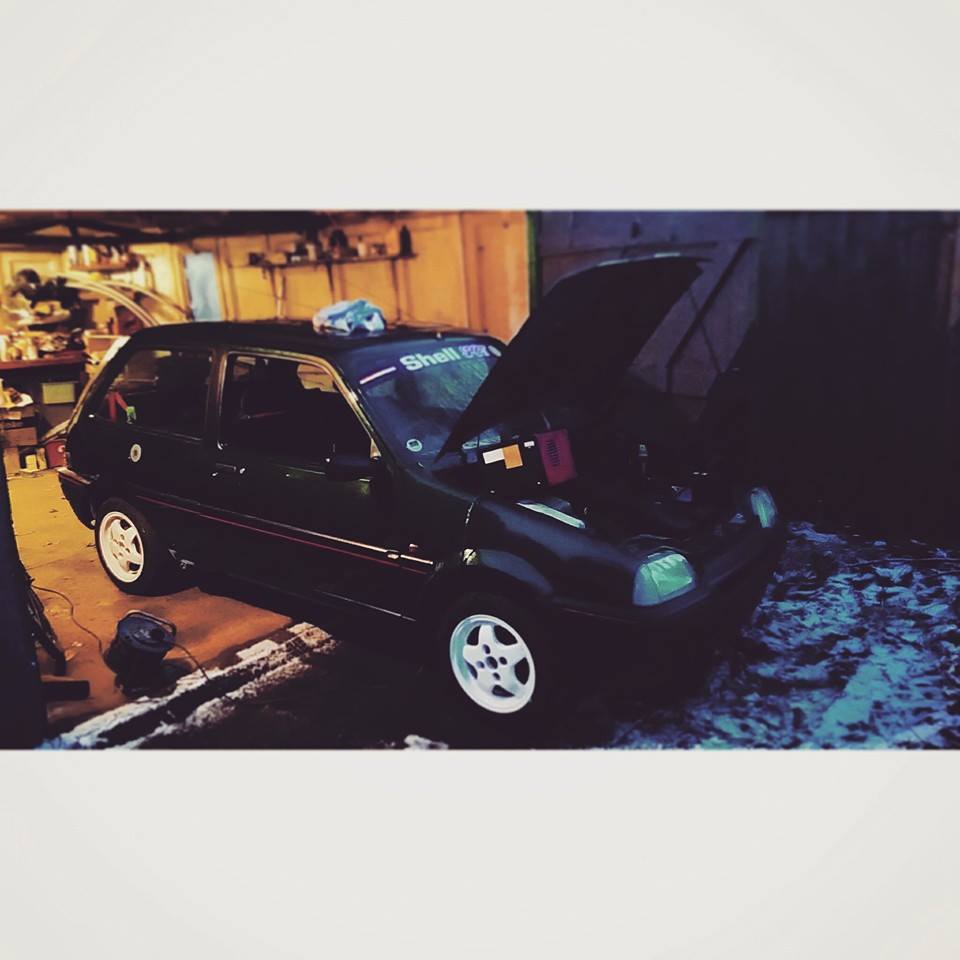 New user Posts: 17 Location: Coventry | Due to already owning a MK3 Gta (undergoing a 'resto'), and the insurance being an excessive amount due to my age, i started looking out for another more basic model in 1.1L form, which brought the insurance cost right down past the half way mark of the GTa. - Anyway, whilst trawling through various fleEbay listings, a 95% fairly mint 1 owner 32,000 miles, 1.1 Knightsbridge spec R100, based 13 miles away from me came up, stating it had, had various welding already done to it; such as - Inner + Outer sills O/S AND N/S and the same with both rear arches. Obviously already owning a Metro, i thought there was a bit of BallS**t going on just to sell it on etc. but for £300, i couldn't really shut the chance down, being a 3 Door it'd be ideal as spares for my other one.  So here's a few photos -    After a quick look around there are a few very small rust bubbles on the rear valance and the spare wheel well, but they are only about the size of a 5 pence piece, so nothing a bit of a sand, red oxide and a splash of Waxoyl will sort out. Along with a bit of a dodgy colour match on the O/S rear wheel arch, front and rear window seals have shrunk / cracked, but don't let any water in, aerial missing and finally the front bumper bracket doesn't line up properly. But apart from them really small problems, its mint. As you can probably see, there are a few items on the passenger seat that are yet to be fitted, along with an interior swap, so will update with pics etc. as and when they get done / fitted. Edited by Mhadley 18/11/2016 2:38 AM | ||
| ding |
| ||
    | Looks alright that. I've got a GTi already, but had a few quotes on various other metro's and R100's and it's a hell of a lot cheaper for me to insure a GTi than it is any other model. | ||
| 111Sli |
| ||
 Transport Guru MP Moderator Posts: 4947  Location: Bromley, Kent | Looks a clean shell! I can recommend Dynax cavity wax as it's Marine grade and also comes in a large aerosol can with long sprayer to easy to use and get into tight voids and box sections. | ||
| Mhadley |
| ||
New user Posts: 17 Location: Coventry | Ding - Yeah mine was the other way round, GTa was about 2300 per year (1 years no claims, shocking i know) and the Knightsbridge was about 1200, so nearly half the price. 111SLi - Where does the cavity wax spray like paint too, or does it not dry?, just had a look around for some online, what will 1L do?  Edited by Mhadley 18/11/2016 2:38 AM | ||
| Mhadley |
| ||
New user Posts: 17 Location: Coventry | Had a bit of spare time tonight at work so bought the Metro round from the compound and pulled the old Knightsbridge interior out to take the rather flat and dull grey carpet, and replace it with some nice thick black stuff out of a GTi / GTa (as i have Red MG carpet in my Mk3 GTa) so had the black stuff spare, so thought why not!. Looks 1 Thousand times better than the rather wrecked grey stuff which had deep holes in around the foot area on the drivers side, gave the floor mats a good scrub too.      Looking for a set of red seat belts to take away the dullness / fairly 'just over poverty spec' look, had to re-drill a few holes and screw a few more self tappers in to make the carpet fit perfect (OCD Alert!!)  Edited by Mhadley 18/11/2016 2:38 AM | ||
| 111Sli |
| ||
Transport Guru MP Moderator Posts: 4947 Location: Bromley, Kent | The cavity wax doesn't dry, it's like waxoyl but better. Best place to spray immediately is behind the boot side carpets into the inner arch. Use a torch, you'll be able to see in where the inner and outer arch skins meet, and where condensation traps... Then do the same behind the rear interior 1/4 panels which then leads into the sills at the bottom. Also inside the rear panel- rubber bungs provide access inside the boot. Basically anywhere. Oo inner front wings too. Lol | ||
| Mhadley |
| ||
New user Posts: 17 Location: Coventry | 111SLi - Will get some ordered, yeah i know which areas you mean now, still can't believe how clean it is to be honest. | ||
| Mhadley |
| ||
New user Posts: 17 Location: Coventry | Whilst the carpets were out i decided to change the interior around a little bit, managed to get some R100 GTa front, rears and door-cards which are actually in pretty reasonable condition, well apart from the odd bit of mould from when they have been stored, but that will easily clean out. Style of seat in picture below, couldn't really argue with a price of £50, considering that there are no rips / burns / tears in any of the material.  Fitted the rears as they're easier to do first (from past experience, will need to get some extra seat mount bolts though as the GTa is a split rear bench, as before the Knightsbridge was a single solid bench.  With the rears fitted in and in working order, i moved onto the fronts, as you can see there are some mould patches, but i've cleaned a lot lot worse before, so no worries.  Moved onto the door cards, this is the standard Knightsbridge pattern which i'm not a great fan of to be honest.   And now the GTa spec door cards. (fitted to drivers and passenger sides).   So the interior swap so far has went to plan, didn't really have any problems swapping it over, looks quite good with the black carpet set, now just to hunt down some red belts to match the piping.  | ||
| Tobys |
| ||
 Regular Posts: 179 Location: Sittingbourne, Kent | Nice addition to he car mate! Red seat belts would also be a nice addition. I think a change of steering wheel would make the interior look a lot better in my opinion | ||
| Mhadley |
| ||
New user Posts: 17 Location: Coventry | Tobys - Yeah i have red belts in my GTa and they set off the interior really nice. how would i go about fitting an MGF / TF or Rover 25 steering wheel, as i know its not as easy as it was in my MK3 (Have a Moto Lita Cooper steering wheel). | ||
| Mhadley |
| ||
New user Posts: 17 Location: Coventry | As with finishing fitting the seats and carpet set, i moved onto fitting my Peugeot 306 centre console, which is quite a nice mod i found, fits nice too. Would be nice if it had cup holders in but will try and find another alternative for that problem. Took the gear gator off, but left the bracket screwed down so that it still holds the seal where the hole in the floor is for the gear linkages, and also took the tape cassette holder out, but again, left the bracket there for a little support for the top half of the 306 centre console. Test fit -  Fitting wise it does require a bit of trimming on the bottom, i used a Dremel and a small cutting disc to remove excess plastic, most of the structure is held together with plastic welds which can be heated up with a lighter and then re-welded when being fitted back together. - i did take pictures of the trimming but for some reason they didn't save on my phone... Made some metal tabs which will hold the top half of the centre console in place, just used a marker board from a trailer (basically a sheet of aluminium), and made some little brackets up.  The final bracket consisted of what is above, but has 2 holes in, 1 at the top and 1 at the bottom. The top hole was then screwed into the same place where the heater duct pipes are screwed into the bottom of the dash, and the bottom hole had a self tapper put through it which goes into the console itself, the sheet wasn't very thick so was able bend / wrap it around the edge of the console to get a nice fit. Brackets fitted -  finished the brackets off with a light sand and the rounding of corners to make it look nice and neat.  The bottom of the rear coin holder has the base cut out of it so that the MK3 style seat belt buckles can feed up through the cut base, as the MK4 (R100) buckle setup is slightly different bracket wise and looked a bit S^%t to be honest, so will be replacing with A MK3 one hence why there are not buckles in the pictures. Bracket on the other side -   The leather gear surround is the one used on a 306, which clips into the console, and the leather handbrake cover is just the one used in the metro carpet but unstapled away from the carpet and tucked in the handbrake slot. Just need to fit the MK3 buckles and will make some small plates up to secure the rear half of the centre console down. | ||
| Mhadley |
| ||
New user Posts: 17 Location: Coventry | After the centre console, i started on the GTi body kit (bar the front splitter, as im keeping the R100 look for the moment), so i have - O/S Sideskirt - sprayed in JAX Kingfisher. N/S Sideskirt - sprayed in JAX Kingfisher. Both rear arch spats - in JAX Kingfisher blue. GTi boot spoiler, with just the spoiler piece spayed in JAX Kingfisher blue, however this is minus the 4x screw cap covers in the top, but i can just make some out of ABS plastic on a belt sander. Started off fitting the spats, so removed the rear bumper - Pulled boot arch carpet off and un-done the N/S arch bumper bolt and......  it broke off, so went round the workshop and popped it in the vice, so i could drill it out.  All re-drilled out.  With the rear bumper removed, i set off about fitting the O/S first.    I screwed the bottom of the spat on first, as i mates / lines up with the bottom bumper support pieces, and so i could get it 95% lined up the drill the 3 holes that go in the arch. The carried onto the top most hole on the spat to get the line up of the other holes 100%. Then drilled the remaining holes, and screwed the self tappers in with 2 sizes of washer, used stainless screws and washer to prevent the from rusting, so that they can be removed without hassle for cleaning etc. at a later date. I then moved onto the N/S spat again doing the same as above.  Again using stainless fittings to make future life easier. Whilst the rear bumper was off, i treated the rear valance, there was no major work to be carries out, it was just really small dots of surface rust everywhere, which i ground back to the metal and treated.   Then put a base coat of Red Oxide on for treatment.  Then applied to coats of Waxoyl - i know its not the most appealing but this car will have a mixed life of being dry stored and left out in the rain.   The inner valance will be getting spayed with Dynax cavity was through the rear fog light holes, so will the inner rear arches through the cutouts in the boot. Next on the Hit-list was the GTi side skirts - Removed the R100 sill cover to find that it had actually had a brand new N/S sill, which i was happy about (due to the fact i have the bill from 2009).  Put the R100 sill cover to one side and got the GTi one out of the office and seen this written on the inside??  Looks like a signature, date and time wrote on the inside in silver pen...Quality control maybe?? Then went about offering up the sideskirt to the sill, using the very professional method of foam and blocks of wood  Then held it up in line and pushed it as much into the front arch as i coukd and marked out the first mounting hole. Screwed that one in with a small stainless washer and self tapper, and marked up the other holes for the front section of sideskirt. Done the same with the rear and ended up with this....   They fit about 98% right, but the sticky outtie bits can be sorted with a bit of inner brackets and 3M double sided tape. Then pulled it outside in the cold to do the O/S sideskirt -  Again to find a brand new O/S sill had been welded in, quick picture of the fitting of the side skirt -  Excuse the mud, was having a bit of fun on the farm track.  Anyone know a solution to this problem??   Also checked the Antifreeze -  This is how she's sitting at the moment, just awaiting some spare time to fit the GTi / GTa boot spolier.    Toying the idea of putting the MK3 front mudflaps (ones with the Rover logo on), on to the front / edges of the GTi side-skirts?? | ||
| DotMatrix |
| ||
 Expert Posts: 4458 Location: Jelling, Denmark | I really like the centre console. that looks like a nice mod. | ||
| Mhadley |
| ||
New user Posts: 17 Location: Coventry | Managed to source a complete rear anti-roll bar over the weekend which should stiffen up the rear a bit more - Am going to strip all the brackets off, give them a wire brush, clean up, lick of paint and maybe some new polybushes.  Glad i finally got one! Also picked up these 6 Spoke GTi/GTa/GSi alloys, got a set of 4 (and 2 steels for tyres, but doubt ill use them).   Will most likely get them powder coated silver, light grey or gun metal. As there is a powder coaters based about 2 miles away from the workshop. Now on the hunt for the Centre Caps for these, i think i have 2 lying around, but basically need 4!!! | ||
| Tobys |
| ||
Regular Posts: 179 Location: Sittingbourne, Kent | There are some mods going on here! Love the work you have done to the R100 so far, keep up the good work! I do like a good, and different read! | ||
| Mhadley |
| ||
New user Posts: 17 Location: Coventry | Tobys - Thanks mate! nice to see someone enjoys reading it you got a build thread yourself?? Started on the Rear Anti Roll Bar tonight, the brackets looked like they were going to be a challenge of their own to take off....     So switched the work lights on and pulled the vice out in the back of the van (as the workshop one is a bit too heavy duty).  Sprayed the rear tow point bracket with maintenance spray to loosen up the polybush and managed to slide it up to the droplink bracket.  Then tried to undo the droplinks from the actual roll bar which proved difficult even with a range of tools....   So i ended up putting a fresh blade on the hacksaw, and being rather sacrilege and cutting the bolts off....   Was hard work cutting through them! I then tried to undo them thinking it was threaded into the roll bar......  But then realised after closer inspection is has a sleeve on the bolt, which the main polybush for the droplink sits on, so out came the hacksaw again!  Then knocked the remainder of the sleeve / bolt through with a hammer and punch. Then had to cut the clamp on the bracket to get the old and very stiff polybush over the end of the roll bar, i tried burning the polybush out but had no luck.  Same process for the other side, cutting the bolts off, putting slits in the brackets / polybush clamps and sliding them off the roll bar.   After about an hours work i now have a bracket-less rear anti roll bar, ready for a good sanding and wire brushing, debating wether to spray it myself or get it powder-coated when i send my alloys off. I now have a set of half useable brackets   Will just get some stainless ones ordered from Ralph / Component Eng, either this side or the other side of Christmas, might as well to be honest, will also get some polybushes to make a nice Rear ARB setup. If anyone has a Front ARB, let me know  | ||
| Tobys |
| ||
Regular Posts: 179 Location: Sittingbourne, Kent | I do have a journal started, but due to other circumstances, I haven't had a chance to anything to my car at the moment. I still have a 5 door R100 that needs an engine put into it, but I have been so busy with work and other commitments I've not had a chance to do anything to either cars! Good luck finding a front anti roll bar, I have a pair to be fitted to my GTA, just saying | ||
| Mhadley |
| ||
New user Posts: 17 Location: Coventry | Tobys - Yeah same happened with me too, hence why there isn't a build log for my MK3 GTa, which is still in build Let us know when you start posting / updating it bud. Yeah will be hard, but i'll find one So after getting the old brackets off last night, today i got some spray out and the wire brush and gave it a clean up, nothing concourse, but just a general tidy up as it was a bit scabby.   Put it in the vice, as you can see in the second photo its quite rough, but nothing a bit of work will sort out. ^  As you can see, the left hand side has been sprayed and wire brushed back, and the right hand side has been sprayed but not yet brushed back.^   Stood it upright in the vice, so i was able to wire brush the ends up. ^      All tidied up, come out quite well for an hours work, of wire brushing and a bit of sanding. ^  Was a bit of paint left on it, which was like super strong, would not come off at all  ^ ^ I then hung it up off of the RSJ's on the mezzanine, using some bungee cord with hooks on.  Then found some grey primer in the workshop that had been stored a long time, and it had separated...so had to spend 10 minutes of my life mixing it back up.  Started to brush some onto the ARB.  Halfway there...  Grey stage complete!  When wet ^  When dry ^ The carpenter over the road reckons he might have some 216 GTi Flame Red paint lying around from when he used to own one, so if thats found will spray it up in that. Was toying with the idea of having it powdercoated but thought it wasn't worth it with it being under the car and all.....So will probably end up giving it a few coats with the good old brush with the Volcanic Red in the picture below...  | ||
| Mhadley |
| ||
New user Posts: 17 Location: Coventry | With the grey primer dry i decided to give it a coat of Red Oxide, due to the fact i will now be spraying it GTi Flame Red, as the can of spay paint was found The GTi paint, this can of paint is older than i am!  Half of the Red Oxide painted on the rear ARB.   The whole lot done.   Its actually came up quite well, will give it a coat of Flame Red tomorrow, should come up quite nice. Hopefully will be collecting 2 colour coded R100 bumpers in JAX Blue (Exactly what the car is sprayed in) tomorrow, along with X2 GTi / GTa / GSi centre caps for my alloys, meaning i'll be able to use them as templates to make the other 2 up. | ||
| Mhadley |
| ||
New user Posts: 17 Location: Coventry | Managed to find some spare time to pick up some other bits today - Front R100 shape bumper in JAX Kingfisher blue - Okay condition. Rear R100 shape bumper in JAX Kingfisher blue - Pretty good condition. X3 GTi / GTa / GSi alloy centre caps, with Rover logo on them. The Front bumper...  As you can see, there are slots, grooves and holes cut into it, but with some fresh wire mesh backing them i think it will make quite a nice touch.   The line of holes at the top will be covered up by the R100 grill anyway so that doesn't really bother me. The slot cut outs on the right and left sides of the bumper, will either be meshed up, or i might find some subtle daytime running lights to fit in there. As you can see one of them is already meshed up.   The front bumper has some quite nice scuffs on, but ill touch them up and polish them into the existing paintwork on the bumper.   Now for the rear bumper, which is in quite good condition.   Very very very minimal scuffs on the rear bumper which means less preparation work for me.   Another nice bonus was the fact it already had a twin fog light conversion, which i have been wanting to do on my MK3 GTa for a long time, all i will have to do is make a nice link loom going from the existing loom on the drivers side over to the passenger side on my R100.  And finally the X3 centre caps i managed to get, hopefully getting a 4th one to make a set   As you can see, one of the locating tabs has fell off one of the caps, but nothing a bit of bonding adhesive and some ABS plastic will sort out.  Then a quick picture of one of the alloys with a centre cap clipped in...  | ||
| Tobys |
| ||
Regular Posts: 179 Location: Sittingbourne, Kent | The centre caps are always a smart thing to have, as well as the twin rear fog light conversion. I have the spare twin rear fog lights to put on my mk3 GTA, but again, it's having the time to do it. | ||
| mini-mad-craig |
| ||
 Elite Veteran Posts: 978 Location: Walderslade, Kent | Great to see another new project here on the forum! Welcome! Car is looking very smart. On the bumper front... I am breaking my kingfisher blue R100 very soon if you need a good front bumper. There is a couple of small scuffs I'll send you pictures of if you're interested but nothing major and certainly no holes! My wing mirrors would be a nice addition for you too!  | ||
| Mhadley |
| ||
New user Posts: 17 Location: Coventry | Quick update on the R100 build, haven't posted in a while due to work etc. Ordered Ralph's rear ARB bracket kit, rear droplinks, rear bushes (that go in the clamps), rear handbrake cable (Quienten & Hazzell), pair of rear brake cylinders (Q&H) and a set of 4 rear brake shoes for the O/S/R and N/SR (also Q&H). Thought I might as well do a small overhaul on the rear brakes, as I'm going to have to take the drums off to fit the rear ARB and brackets. The first part that came, was the rear handbrake cable -   Then followed by Ralph's brackets (Otherwise known as Component Engineering), he does some real nice stuff, will be getting a few more bits in the near future -  Then the rear brake shoes and cylinders also arrived -  Followed by the rear ARB droplinks and bushes, would've had some of Ralph's OEM+ ones, (stainless and polubushed), but they're very popular and we're not in stock on the store page.   They will be getting replaced for polybushes in the near future, but just got some OEM ones for the time being. All of the pieces are nearly here for the MOT except the tyres, will get them ordered and all these bits fitted and then it's MOT time!  Edited by Mhadley 13/1/2017 1:51 AM | ||
| DotMatrix |
| ||
Expert Posts: 4458 Location: Jelling, Denmark | good things being done I can see. do you use the car as your daily driver? Edited by DotMatrix 24/1/2017 11:02 PM | ||
| Jump to page : 1 Now viewing page 1 [25 messages per page] |
| Printer friendly version E-mail a link to this thread Jump to forum : |
| (Delete all cookies set by this site) | |
| Running MegaBBS ASP Forum Software v2.0 © 2003 PD9 Software | |
